With features such as the Streaming API and so many other integration options, the Force.com platform is well equipped to launch devices into the Internet of Things. We played with the idea of a Force.com-integrated remote-control quadrotor.

Choosing a drone development platform
The AR Drone is a remote-controlled toy quadrotor sold by Parrot. It contains a wealth of addressable sensors and embedded smarts. This interactive, hands-on project demonstrates Force.com's ability to interface reactively with the world in real time. We used:
- Node.js
- Parrot AR Drone
- Force.com Developer Edition
We wanted to communicate with the quadrotor in both directions. So we took a subset of the available commands and implemented them on the platform. This allowed us to receive telemetry data and photos from the onboard camera. We also transmitted user input from the platform, such as take-off or landing instructions. Several features were key:
- Formulas, which simplified the generation of commands,
- JavaScript Remoting, to provide a snappy piloting interface,
- The Streaming API, to notify the quadrotor of commands rather than it have to poll the platform
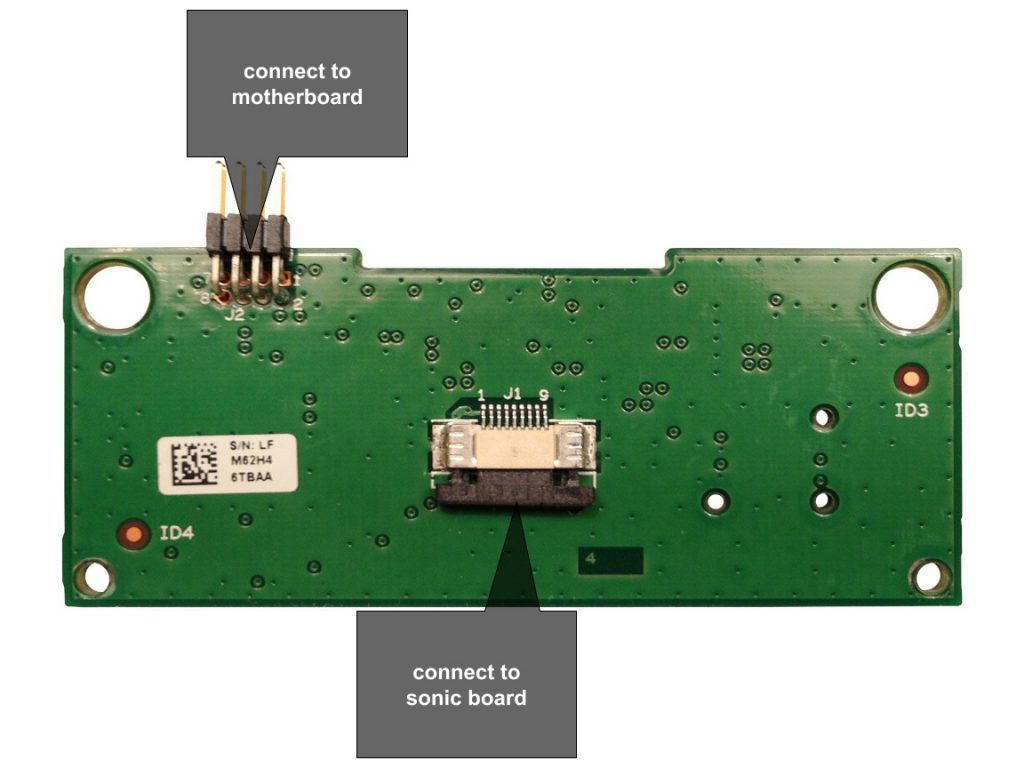
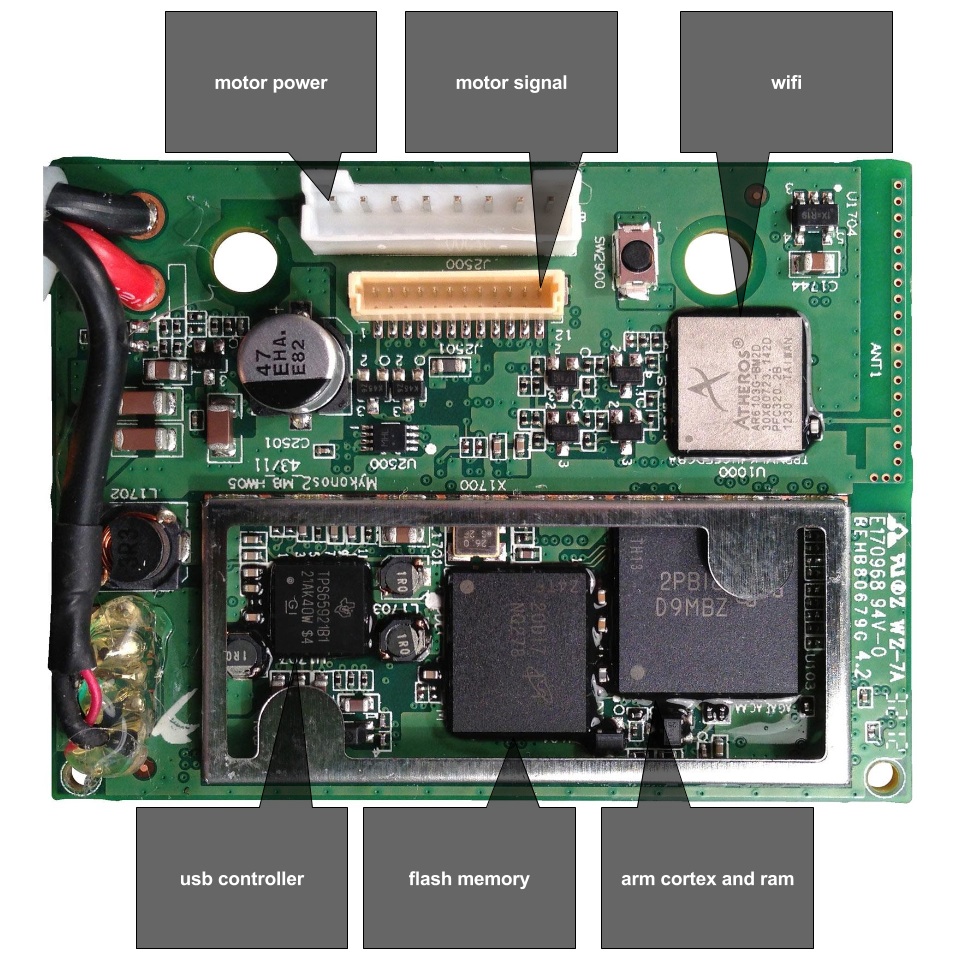
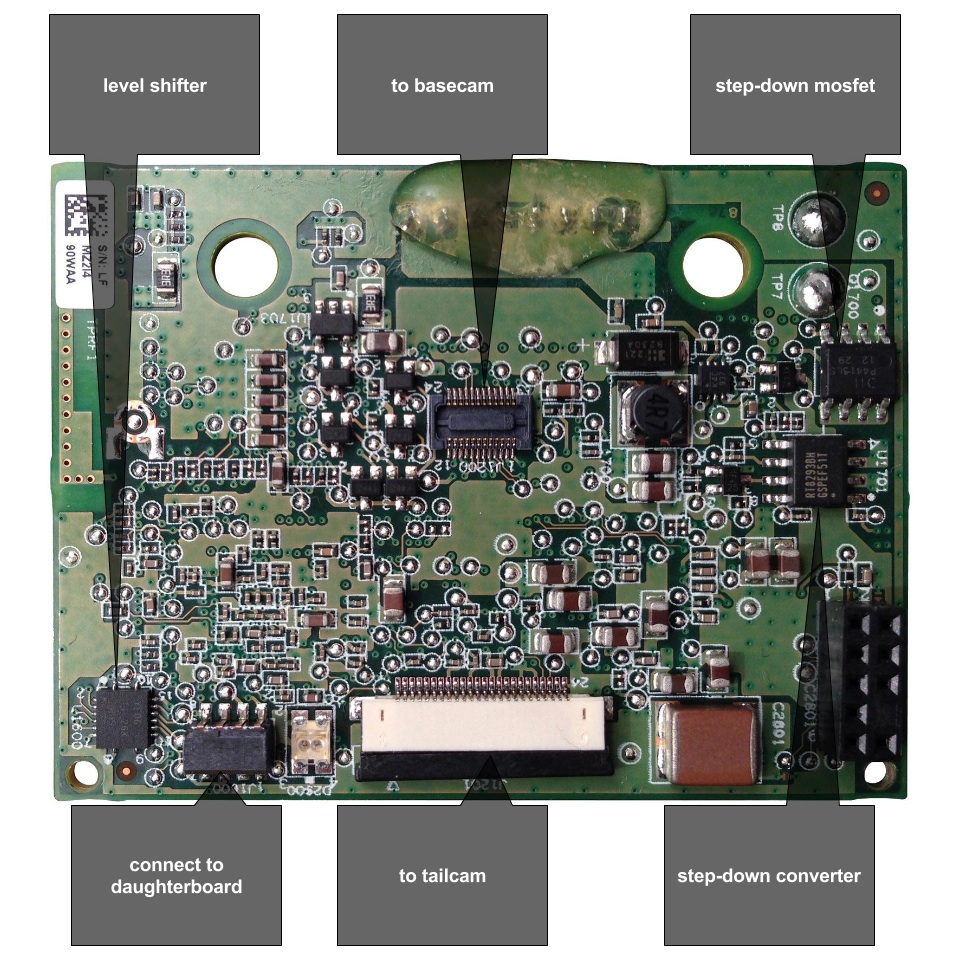
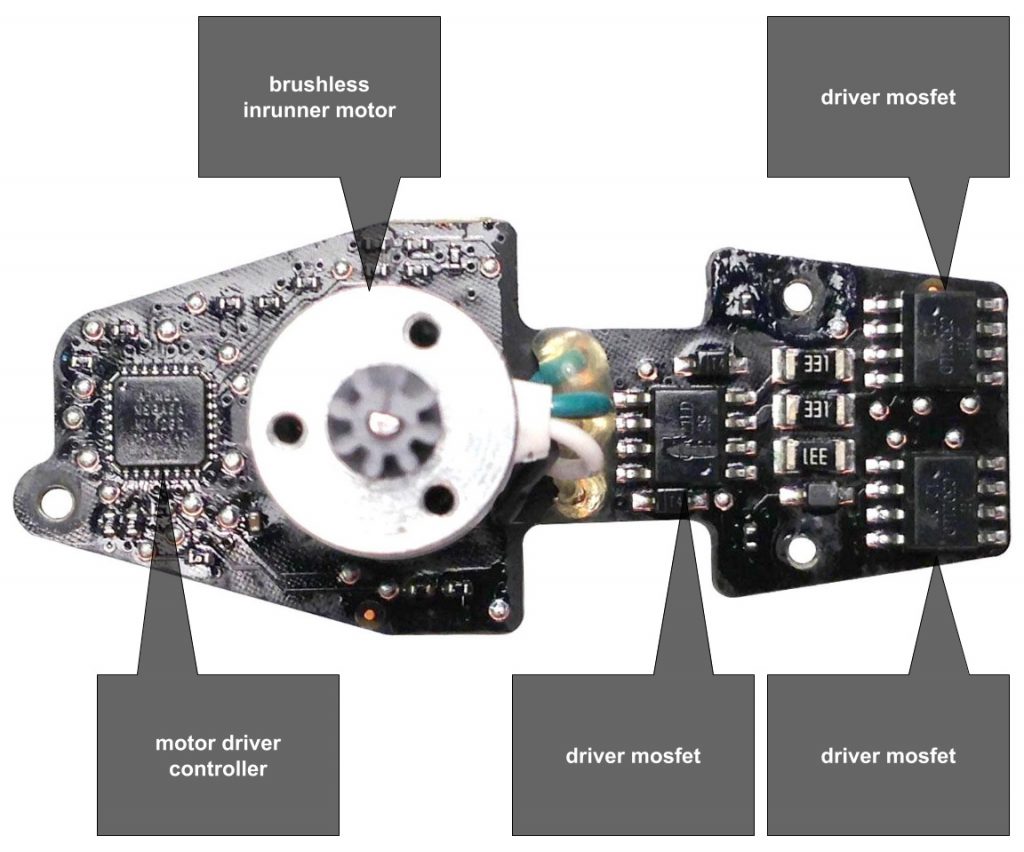
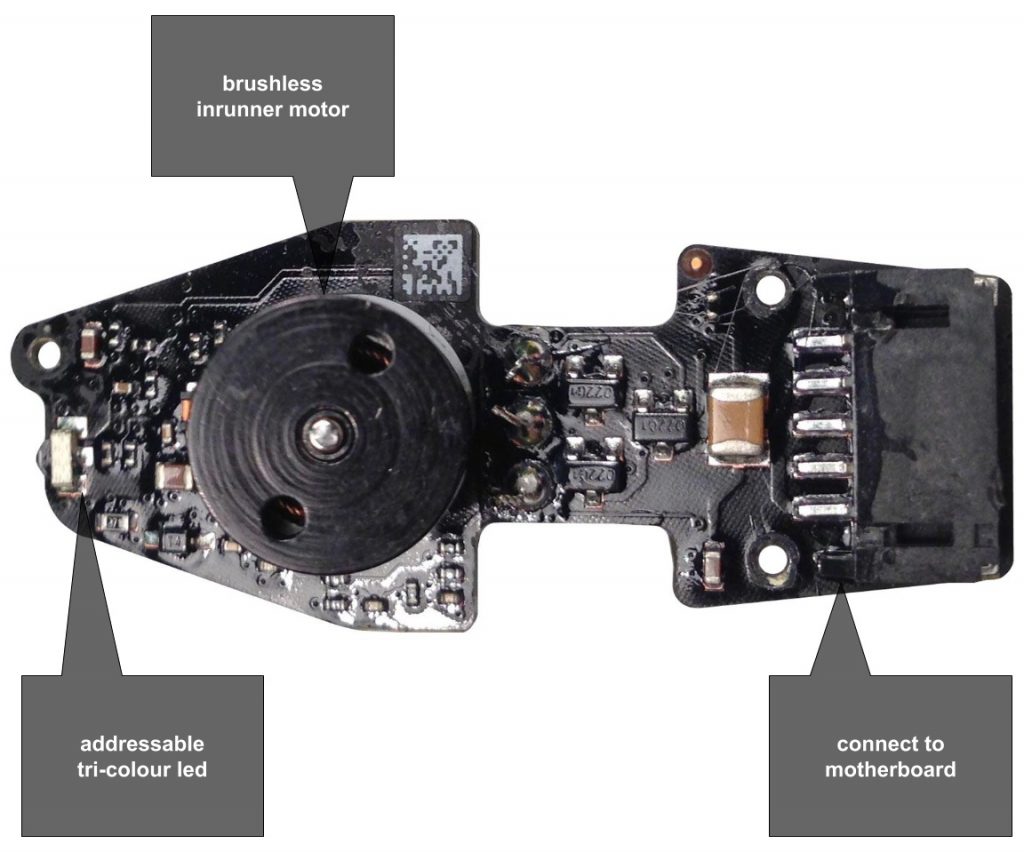
What's inside an AR Drone?
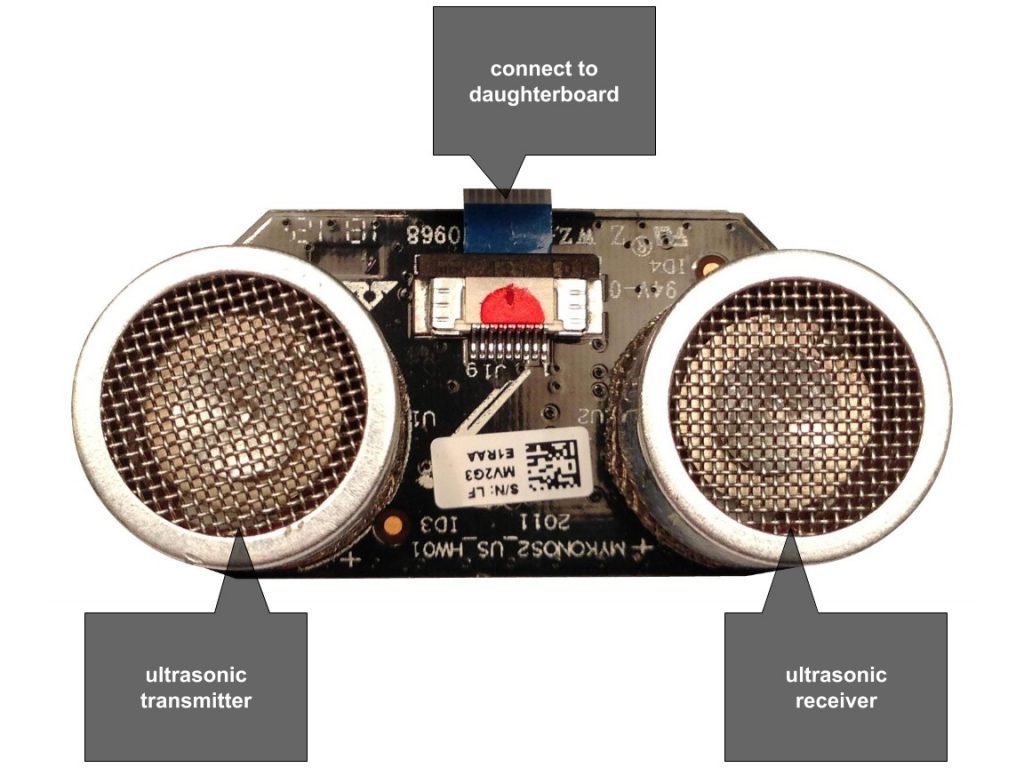
- 1GB flash memory - Micron MT46H64M16LF
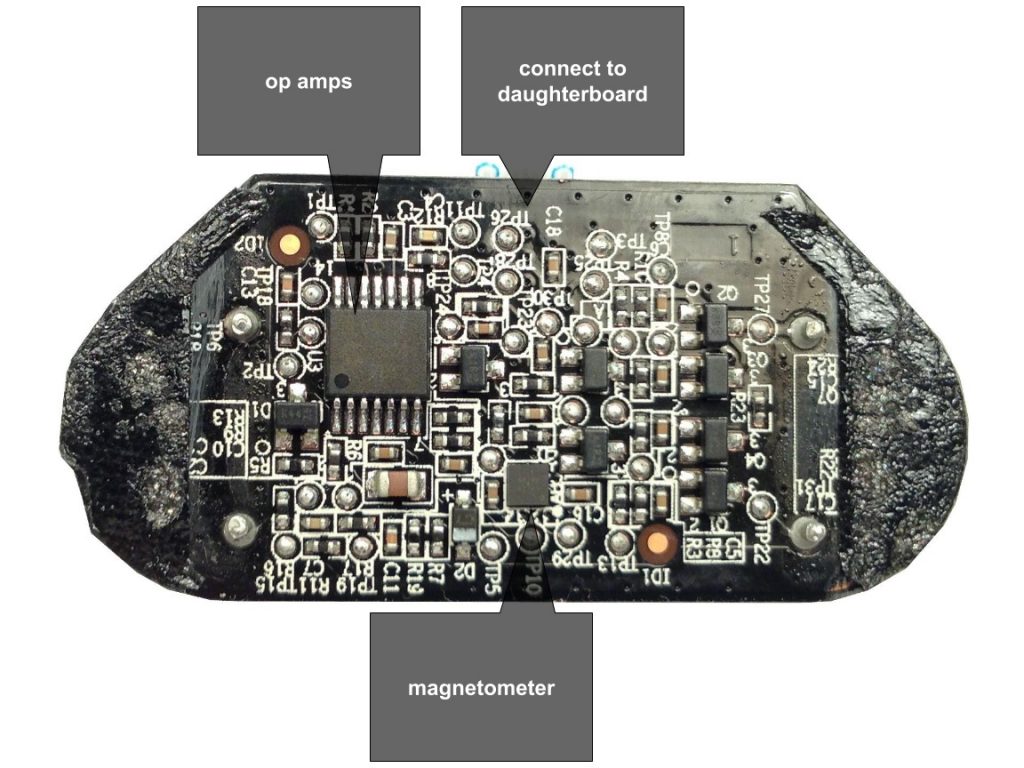
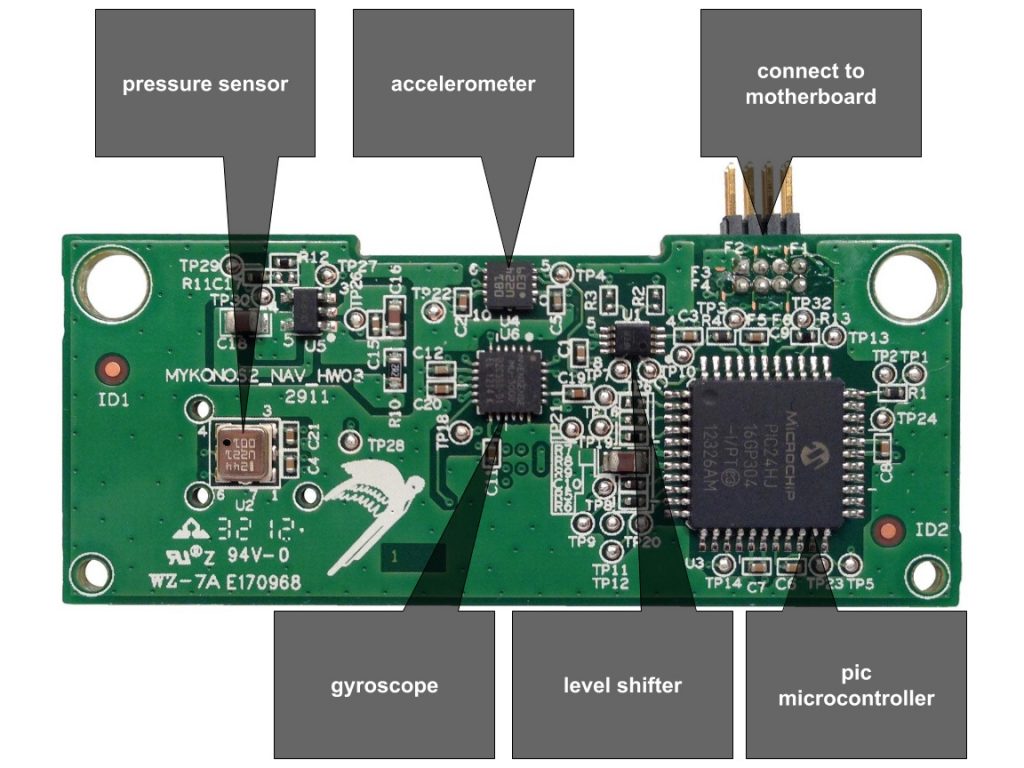
- 3-axis magnetometer - Xtrinsic MAG3110
- MEMS inertial unit - InvenSense IMU-3000
- PIC Microcontroller - Microchip PIC24HJ16GP304
- 802.11n Wi-Fi - Atheros AR6103
- 1GHz 32-bit ARM Cortex A8 with 800MHz video DSP TMS320DMC64x
 |
 |
 |
 |
 |
 |
 |
 |
Getting airborne
Before doing anything with the platform, we perform some sanity checks on the quadrotor interface. We can get a feel for the API and set our expectations around response times etc. Plus it's fun to see the thing fly. The quadrotor has a wi-fi chip that starts in Access Point mode. A computer must be connected as a client. The quadrotor has the IP address 192.168.1.1 and the client will get 192.168.1.2
Handshaking is the very first interaction with the quadrotor. It's like HELO in SMTP and confirms that everything is working from the network interface to the application. In OS X, network interfaces are exposed as 'device files' /dev/tcp and /dev/udp. We 'write' to these device files from the command line to perform a handshake. With the quadrotor turned on, do:
$ echo -n 'PARROT AUTH' | nc -u 192.168.1.1 5552
PARROT AUTH AR.DRONE OK
- the dollar operator $'' scans inside the single quotes to take care of ANSI C escape sequences
- the pipe operator | uses the output of the echo process as the input for the nc(netcat) process
- the carriage return \r escape sequence is needed by the quadrotor to signify the end of a command
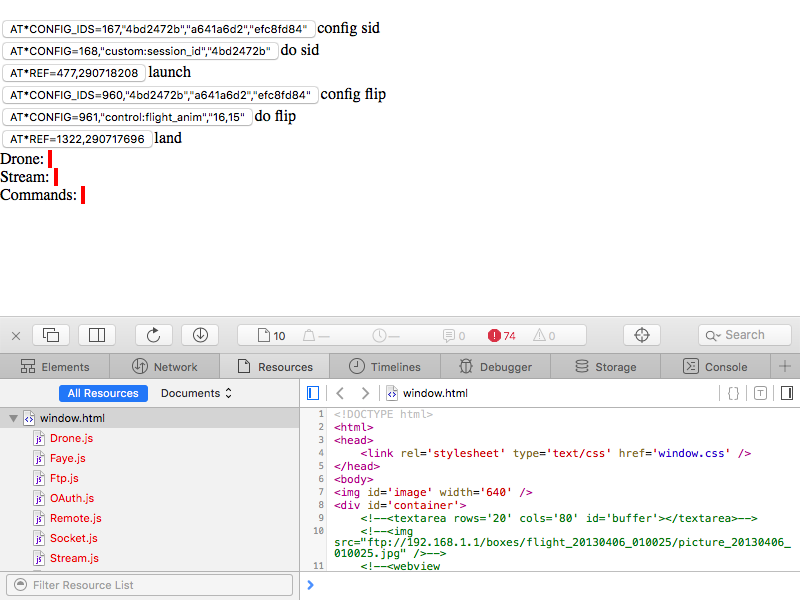
Before building a cloud-based piloting interface and bridging Salesforce (HTTP) to the quadrotor (UDP), these command line checks allow one to explore. With the quadrotor in an open area, the takeoff command is invoked from the command line:
echo -n $'AT*REF=1,290718208\r' | nc -u 192.168.1.1 5556
And a land command is invoked like this:
echo -n $'AT*REF=1,290717696\r' | nc -u 192.168.1.1 5556
Connecting the bridge to the quadrotor
Salesforce provides two transport protocols for communicating to the world outside. Both of these use TCP packets, with delivery usually ordered and guaranteed:
- HTTP (REST API, SOAP API, CometD Streaming API, etc)
- SMTP (email messaging, inbound email handlers, etc)
Drone commands are transmitted via UDP, whose delivery is unordered and unguaranteed.
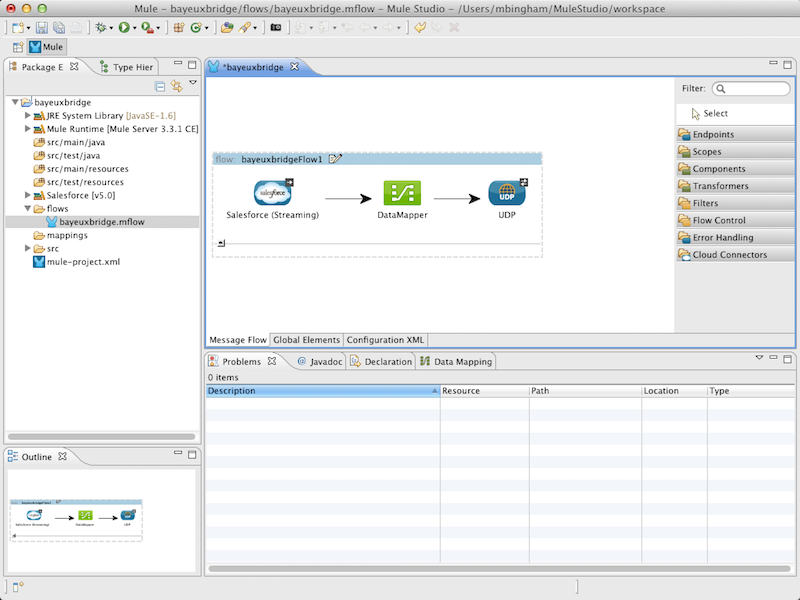
"But Salesforce doesn't do UDP!" we hear you cry. We built a mechanism to translate the protocols and the message formats (SObjects vs command strings). This mechanism is referred to as a bridge and can be implemented in a multitude of ways, for example:
- as a long-running Java or .NET process,
- using Mule Studio's connectors for Salesforce and UDP (see example),
- writing JavaScript within node.js or a Google Chrome Packaged App,
- a Force.com Canvas application, after exposing the quadrotor on the public internet,
 |
 |
Using node.js
After installing node.js, UDP sockets can be availed via the datagram API. Here is the handshake:
var Dgram = require('dgram');
var socket = Dgram.createSocket('udp4');
var buffer = new Buffer('PARROT AUTH');
socket.sendto(buffer, 0, buffer.length, 5552, '192.168.1.1');
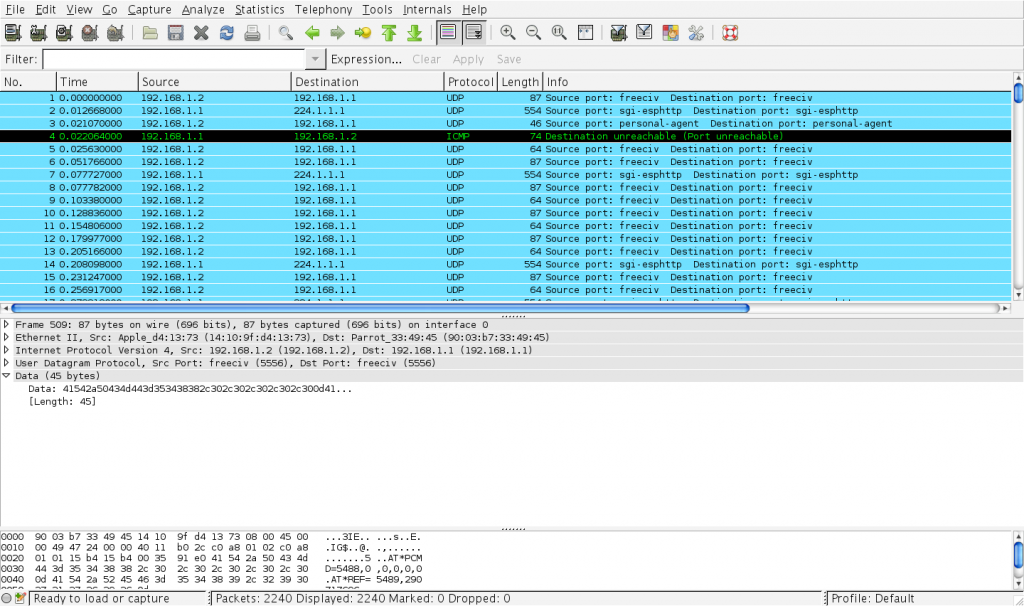
When running the script in node.js, a network packet sniffer such as Wireshark or tcpdump can be used to verify that traffic is actually sent and received. The tool sniffs network packets and prints them to screen, allowing you to see the generated traffic. Starting tcpdump before running the above yields:
$ tcpdump -n udp port 5552
# IP 192.168.1.2.52356 > 192.168.1.1.5552: UDP, length 11
# IP 192.168.1.1.5552 > 192.168.1.2.52356: UDP, length 23
Connecting the bridge to the platform
Half of the bridge connects the quadrotor to node.js. Now for the other half; node.js communicating with the platform without polling for instructions.
Enter the Force.com Streaming API.
"Don't call us, we'll call you."
(the Hollywood principle)
The Force.com Streaming API allows clients to receive notifications about new data, instead of finding it by repeatedly interrogating the platform. It's an outstanding feature and with ever-decreasing response times, we envisage interesting applications in manufacturing and assembly, given easy enablement of devices to consume platform data from a remote publisher.
But in terms of the quadrotor, we just showcase the Streaming API as an event-driven control mechanism. The bridge in JavaScript is the subscriber, and marshalls data between two protocols (HTTP/UDP).
We created a Command__c custom object with a Body__c text field to hold the instructions for the quadrotor. A PushTopic can be created in Developer Console for which the bridge will receive notifications:
insert new PushTopic(
    Name       = 'CommandInserts',
    Query      = 'SELECT Id, Body__c FROM Command__c',
    ApiVersion = 27.0
);
There are several compatible JavaScript clients including CometD (for jQuery and Dojo), Faye (standalone), and WebSync (for ExtJS). Any of these can provide the underlying plumbing for the bayeux protocol used by the Streaming API, and takes care of reconnects, how named topics are exposed, and the request/response data structures etc.
We use Faye, configured to cater to the Salesforce-specific implementation details like the supported stream transport types. The Streaming API requires a Session ID identifying a user which can be retrieved via OAuth, or from a browser cookie spawned on the same instance.
var oauth = new OAuthClient(client_id, secret_key);
oauth.login(username, password + security, function(auth) {
    function handler(command, event) {console.log(command.Body__c)}
    var stream = new StreamingClient(auth.instance_url, auth.access_token);
    stream.subscribe('CommandInserts', handler);
});
Running the above will yield a line in the bridge's console for every command created on the platform. The commands can be created via a Custom Object Tab or Developer Console to test this.
Crossing the bridge
Having independently connected the bridge to both the quadrotor and the platform, the message must actually pass across from one to the other. A handler function is invoked whenever the streaming client receives a command notification. Here we can send UDP packets to the quadrotor using a helper:
function handler(command, event) {
    var drone = new Drone('192.168.1.1');
    drone.transmitDatagram(command.Body__c + '\r');
}
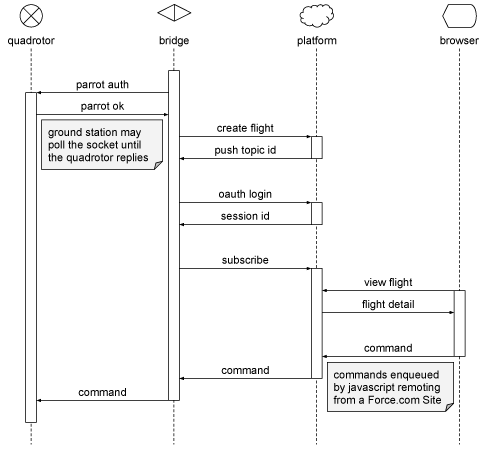
The following UML sequence diagram shows how the whole exchange is achieved:
Generating instruction strings on the platform
The control layer sends AT command strings over UDP.
Here's an instruction string. Take a look at its components:
AT*REF=1,290718208
- string
AT*REFis its type, - integer
1is its intended transmission order, - bitfield
290718208isIsTakeoff=true,IsEmergency=falsein addition to a fixed mask,
Here's another instruction string:
AT*PCMD=2,7,0,0,0,0
- string
AT*PCMDis its type, - integer
2is its intended transmission order, - bitfield
7isIsProgressive=true,IsCombinedYaw=true,IsAbsoluteControl=true - floats
0,0,0,0is momentary Pitch, Yaw, Roll, Altitude velocities in signed IEEE-754 form,
The common denominator of all commands is:
- an AT command type,
- the sequence number (to resolve the potentially unordered delivery of UDP packets)
- one or more of arguments in the form of bitfields, single-precision floats, or strings
The task becomes a mental mapping opportunity; to map point-and-click objects into instruction strings that are always valid and easy to explore.
How AT Command types are used
There are only seven AT commands. These exist to calibrate, reposition or configure the quadrotor. We map these special strings using Record Types on the Command__c object. Each AT command accepts different arguments, whose values are stored using custom fields.
| Record Type Name | Description |
| AT*REF | Takeoff/Landing/Emergency command |
| AT*PCMD | Move the quadrotor |
| AT*PCMD_MAG | Move the quadrotor (with Absolute Control support) |
| AT*CONFIG | Set a configuration key-value pair |
| AT*CONFIG_IDS | Set the profile / application / session for an AT*CONFIG command |
| AT*CALIB | Calibrate the magnetometer (must be flying) |
| AT*FTRIM | Calibrate the horizontal reference plane (must be grounded) |
| AT*COMWDG | Reset the communication watchdog |
Using a formula field to generate a bitmask
The quadrotor includes two important control states which are transmitted periodically with an AT*REF command. The argument is a 32-bit integer of which 2 bits mean emergency and takeoff statuses:
| Bit number | Meaning of true | Meaning of false |
| 8 | Cut engine power | Operate normally |
| 9 | Attempt takeoff | Attempt landing |
Checkbox custom fields represent the states of Emergency__c bit 8 and Takeoff__c bit 9. Bits 18, 20, 22, 24, 28 are special flags for internal use and are always set. In the interests of avoiding code and magic numbers, bit field arithmetic can be used in a formula. Here's the formula to convert to a 32-bit integer, by summing the products.
  (2 ^  0) * 0
+ (2 ^  1) * 0
+ (2 ^  2) * 0
+ (2 ^  3) * 0
+ (2 ^  4) * 0
+ (2 ^  5) * 0
+ (2 ^  6) * 0
+ (2 ^  7) * 0
+ (2 ^  8) * IF(Emergency__c, 1, 0)
+ (2 ^  9) * IF(Launch__c,    1, 0)
+ (2 ^ 10) * 0
+ (2 ^ 11) * 0
+ (2 ^ 12) * 0
+ (2 ^ 13) * 0
+ (2 ^ 14) * 0
+ (2 ^ 15) * 0
+ (2 ^ 16) * 0
+ (2 ^ 17) * 0
+ (2 ^ 18) * 1 /* always set */
+ (2 ^ 19) * 0
+ (2 ^ 20) * 1 /* always set */
+ (2 ^ 21) * 0
+ (2 ^ 22) * 1 /* always set */
+ (2 ^ 23) * 0
+ (2 ^ 24) * 1 /* always set */
+ (2 ^ 25) * 0
+ (2 ^ 26) * 0
+ (2 ^ 27) * 0
+ (2 ^ 28) * 1 /* always set */
+ (2 ^ 29) * 0
+ (2 ^ 30) * 0
+ (2 ^ 31) * 0
Debugging by capturing iPhone network traffic
Comprehensive API documentation is available from the manufacturer. You can also reverse-engineer the AT command strings from the Parrot iOS client by looking at network traffic. Plug the device into a Mac then run system_profile to discover your UDID:
$ system_profiler | grep 'Serial Number'
# Serial Number: {udid}
Now you can start a Remote Virtual Interface for packet capture:
$ rvictl -s {udid}
# Starting device {udid} [SUCCEEDED] with interface rvi0